Products and catalog
TiendaCatalog
Your catalog is the list of everything you sell: at the counter, in the web shop, as a ticket or in a subscription. It is under Inventory.
Find a product
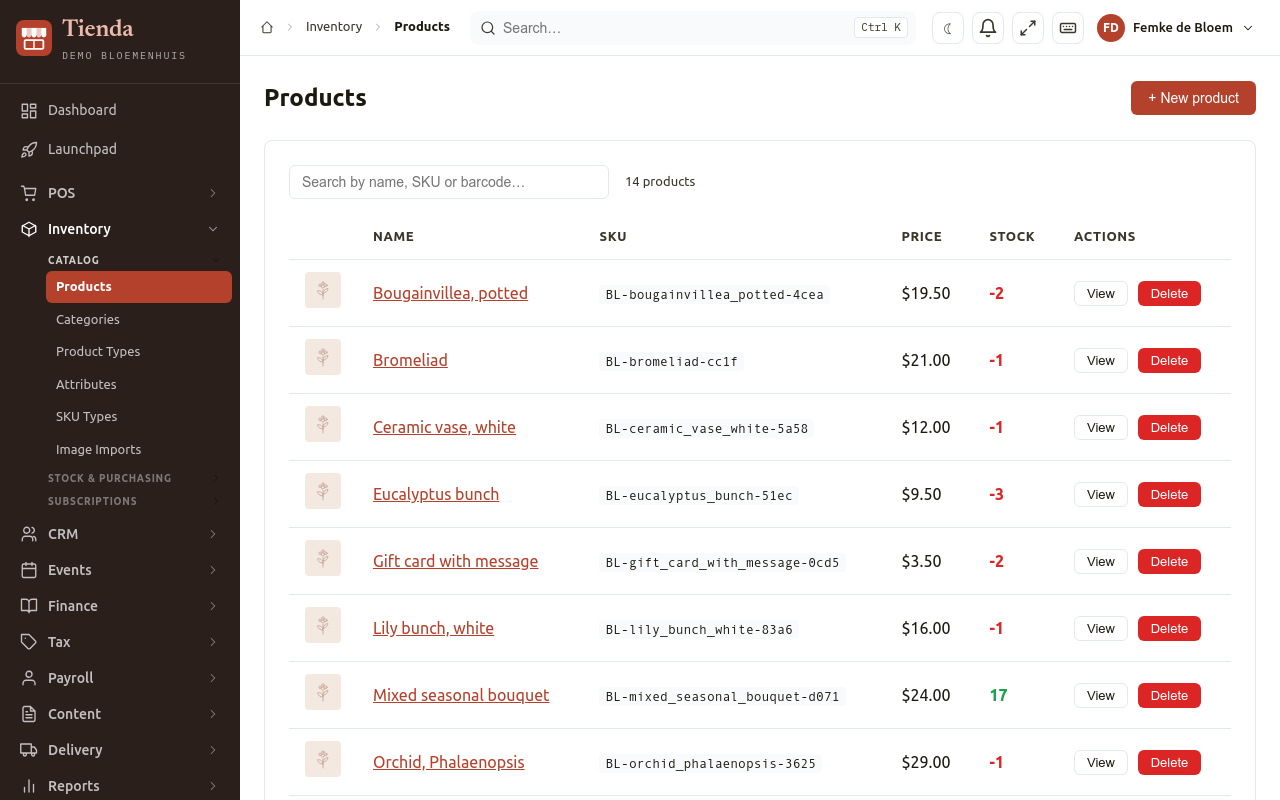
Section titled “Find a product”Open Inventory, Products. Search by name, SKU or barcode. The list shows the Name, SKU, Price and Stock. A product marked Not for sale is not sold at the counter or in the shop.
Add a product
Section titled “Add a product”Before your first product, make at least one product type.
- Open Products and choose New product.
- Fill in:
- per language, the Name and Description (A name is needed in English or Dutch. A language left empty shows the English text.);
- Product type;
- Barcode, if the product has one, so it can be scanned into the New Order form;
- Categories: where it appears in the web shop;
- Sellable: tick it to sell it; Rentable: tick it to rent it out;
- Tax rate: leave on Shop default unless this product is taxed differently, for example a service.
- Choose Save (or press Ctrl+S).
The SKU (article number) is made automatically and does not change.
Prices
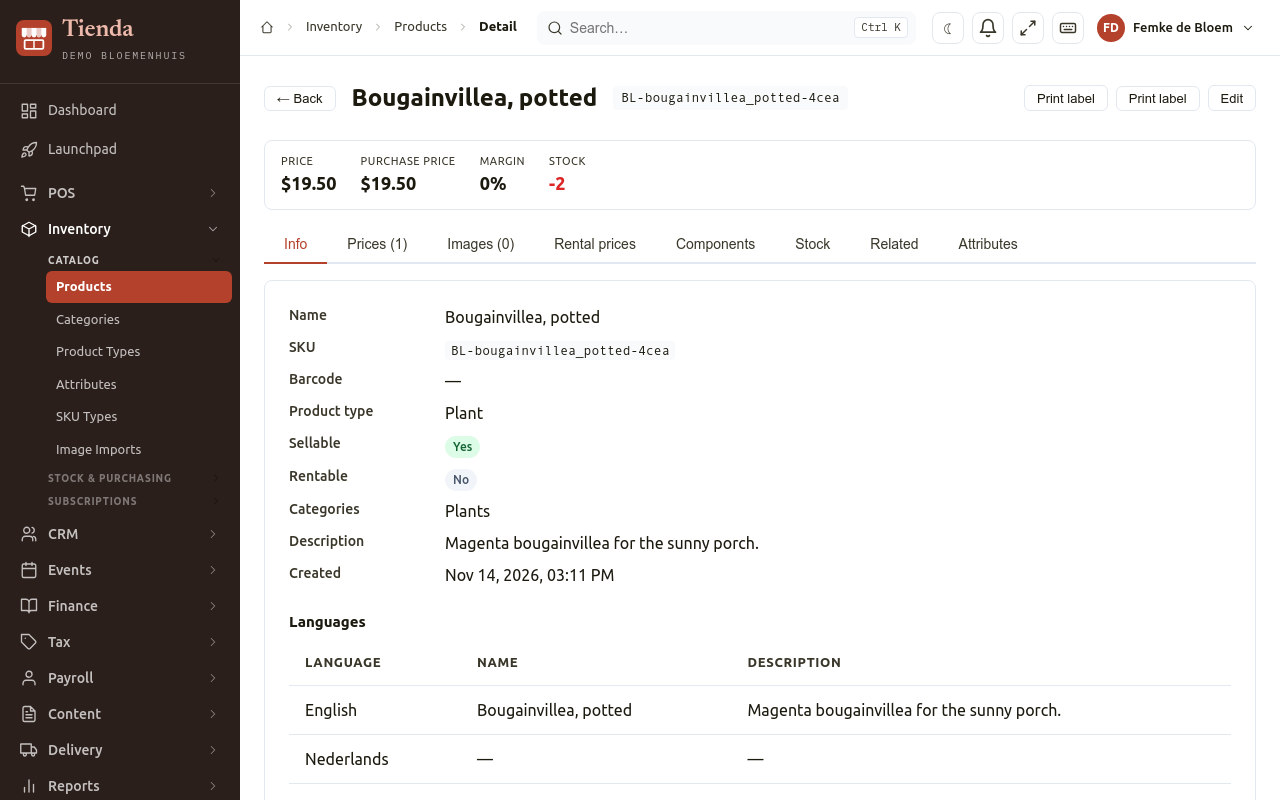
Section titled “Prices”A product without a price cannot be sold. Open the product, go to Prices and choose New price: the Selling price, from when it is Effective and, optionally, when it Expires. A new price replaces the old one from its start date; Price history keeps the old prices.
Purchase price and Margin are worked out from your purchases (see Stock and purchasing).
For rentable products, set prices per period under Rental prices.
Images
Section titled “Images”Under Images, choose Upload images. The first image is the Primary image; Make primary image changes it, Move earlier and Move later change the order. Give each image an Alt text: it describes the image for search engines and for people who cannot see it.
More about a product
Section titled “More about a product”- Stock: what is on hand per location, and its movements (see Stock and purchasing).
- Components: for a product made of other products, such as a gift basket.
- Related: products shown next to it in the web shop.
- Attributes: values such as colour or size (see below).
- Print label prints a price label (see Printing and hardware).
A product Synced from POS comes from your Shiloh POS: its name, description, categories, price and stock follow the POS and are overwritten at every sync. Change them in the POS. See Integrations, POS sync.
Categories
Section titled “Categories”Inventory, Categories: New category, with a Name and whether to Show in shop. A Hidden category is not shown. Show in POS and POS position are meant for the register screen, which is not available yet; the New Order form does not use them.
Product types
Section titled “Product types”Inventory, Product Types groups products of the same kind, such as “Bouquets” or “Plants”. A product type has:
- a SKU type, which decides how the SKU of new products starts;
- a Margin alert (%): a warning is e-mailed when the margin of a product of this type drops below this percentage. Leave it empty for no warning.
Attributes
Section titled “Attributes”Inventory, Attributes defines extra properties of products, such as colour
or size: a Name, a Type, Options (comma-separated) (for example Small, Medium, Large), whether it is Filterable in the web shop and Required.
Fill them in per product on its Attributes tab.
SKU types
Section titled “SKU types”Inventory, SKU Types: a Name and a Prefix, put in front of the SKU of
new products. For example PLT gives PLT-rose-1a2b. Existing SKUs do not change.
Image imports
Section titled “Image imports”Inventory, Image Imports adds photos to many products at once:
- Choose New upload, give it a Name and choose the photos.
- Choose Upload & analyse. Each photo is analysed to suggest the matching product and its attributes. The page updates by itself.
- Check the suggestion of each photo (Looks like, Suggested attributes), correct the Product where needed, and fill in the Alt text.
- Tick the ones that are right and choose Apply selected.